Setup and Configuration of the Logiq e: Ultrasound Training Part 6
Yet another complex feature of the GE Logiq e is its in-depth customization and setup screens. It is likely the most customizable portable ultrasound machines on the market, but it can be daunting to go through it for the first time. This training video helps walk you through the process.
GE Logiq e Setup, Configuration, and Customization Training Part 6 of 6
The final installment of the GE Logiq e Training Series introduces the Utilities features on the GE Logiq e, which involves customization, presets, and a wide variety of settings on the Logiq e.
These screens can be very complex, but I address what each screen does and you can decide what is important and what is not.
The GE Logiq e configuration screens are shown throughout this training series, as many important features can be found there. It’s a good idea to walk through this overview of the utilities screen and understand all the things you can change and customize on your Logiq e.
This is one among many of our videos in our Ultrasound Machine Training library. Looking to buy a GE ultrasound machine? Call one of our sales experts today at (877) 661-8224.
Complete GE Logiq e Training Series:
Part 1: Getting Started with the GE Logiq e
Part 2: 2D Imaging with the Logiq e
Part 3: Logiq e Measurements and Reports
Part 4: Doppler and M-Mode Imaging
Part 5: Exporting and Connectivity with the Logiq e
Part 6: Logiq e Setup and Customization
Managing Hard Drive Space on the GE Logiq e and Vivid e
Improving Cardiac Frame Rates on the GE Logiq e and Vivid e
Transcript to Setup and Configuration customization and presets of the GE Logiq e portable ultrasound machine:
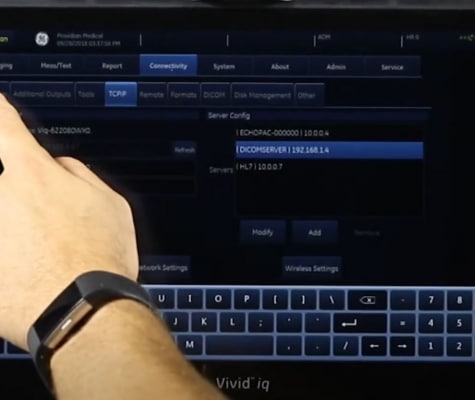
There is a large number of things that you can do to customize and set up the Logiq e. It is a lot more than I can go into on this system, and most people would be bored stiff if I went through every single option, because it really doesn’t apply to most people. But to get to the most important things, let’s take a look here. We click on the utility screen, and we’ve seen this a few times, and we have a number of tabs across the top. These are the major categories up here, system, imaging, comments, body patterns, test patterns, application, connectivity, measurements, administration, service, and bar code. These last three you’re not going to worry about a whole lot. We already talked about what you need out of the admin side.
So the system, and this is real finicky. Every time you hover over something it changes the screen, not up top, but along here. And it will drive you a little crazy. At least it does for me. So here you will put in your hospital name, change the date and time. This default century is saying when you enter a patient’s birth date, do you want this century, the last century.
Applications, if you don’t want all the applications to show up in that presets tab when you choose your program presets, you can remove those here. Prompt for save on exit, if you did not save any image, if you accidentally didn’t save the images correctly, it will ask you. Anonymous patient will remove the patient information from the top of the screen when you’re in the imaging screen. A lot of these are just how you would want to view it. And you can adjust the trackball controls right here in the speed, and that sensitivity of the trackball.
System imaging, this is where we talked about storing loops with no ECG. When I hit that P1 button in a live image, it’s saying, OK, I’m going to store three seconds of the image before I go. So I had to hit it twice, because it’s saying I’ve got it checked here to preview the loop before store. So when I hit P1, it would start playing back that loop, and I’d have to hit P1 again. If you just want to keep going, you hit the P1 in live imaging. It’s going to store the last three seconds, and it’ll just keep going. You don’t have to keep saying that.
This is for cardiac with an ECG attached. How much time you want before or after. The heart beat, and then again, some other ways of how you’re going to view things on screen. I recommend you just look through to see all the different things you can change, because you can pretty much change everything on the system and customize it.
Here are your measurements, your standard OB-GYN measurements, type of cursors, how you’d want to look. I mean, it gets really, really detailed as to how you want to view the system. And to be honest, it’s really a lot of overkill.
Backup and restore, you can back up your settings, your patient archive, your user to find presets, we will talk about how to save presets. And then detailed storing and restoring of their user presets. Easy move and easy backup is so you can either transfer images in the raw format to another logiq e or not. Peripherals, if you’ve got a DVR set up. And then here’s where you’d also set up your printers. And about, we saw this earlier, and this shows you some information. If you ever have service or a problem with your system, you’ll probably, you will come to the screen and provide that information to your service technician.
Not gonna save the changes, I’m just going to go over to imaging. And here you can really get into the nitty gritty of customizing your presets. So instead of going through all these, let me show you a different way to customize presets.
Let’s say just in regular B mode we make some changes to the dynamic range, edge enhancement, the frequency, turn on virtual convex, and then we might have changed some parameters as the line density frame average or some of these things all the way down here change our speckle reduction imaging mode, for example, to a higher [? end ?] to speckle reduction.
Let that go away. And then I can just click preset. You can come over here and click new. And it’s going to say, which one do you want, user one, user two, user three, or user four? And you can put in a name, my preset. Usually for multiple user situations, people will put their own names on it.
I put too much long in there. There is a limit as to how many characters. I have no idea what it is, but I’ll just call it my pre, click OK. And here it appears down here. So whenever I go into that vascular preset, all those changes I made will come up every single time. So I don’t have to keep making those changes each time.
The alternative is to go back to this and set all of your parameters. And you can actually get really into nitty gritty about how many focal zones and all of that. But if you go by the other set up, notice up here it’s saying I’m going to adjust this my preset as opposed to anything else, I would choose the preset from down there and make my settings. But when you do it the other way, you can view live what impact it has on your image. And you can do this for every single mode.
Here we went to before, where you saw the duplex, and the default mode when you begin. So if I plug in this probe, I’m going to say the default application is always going to be abdominal two. Or let’s just say I want it to be the preset I just made, so my precarotid right there. So that would be the default. Any time I plugged in the probe, it would go directly to mine.
Next comment is where you can make– I’m not going to save those changes. I’m going to comments, and this is where you can make your own annotation library. You can overwrite any of these. And this is that menu that showed up on the left hand side. So the one we saw was corroded, so we could go here. And we can override any of these. And then there’s more of a library over here that you can add to the library.
Here’s the annotations. You can adjust how the annotations appear on screen, changing the color, the text size. Next, we have a body patterns. I’m going to skip this, since most people don’t use them. Test pattern is really for the screen and for anyone who’s working with the machine.
Application, go to the settings. This just shows you different things that you can show on screen when you are in a certain preset. For image store reset one or multiple heart rate cycles, this is when an ECG is attached. Foot switch and if there’s stress echo, this is where you make adjustments there. Comments, annotation menu here, body patterns the same. Measurements, this is the various select things you would do in a certain application. So in this preset that I made, if I want the annotations to show up not from the carotid library, but let’s say it’s some other library, I can select which one appears when I go into that carotid. Same thing with body patterns and measurements. This is going to show you when I click here on measurements. When I go into the carotid, and I select a measurement, the automatic one that’s going to pull up is going to be my vascular urology. That way, on that left hand side when I choose measurements, I know what’s going to show up each time.
We address the connectivity, and this is a fairly deep item here. And at this point, I will take a look at the miscellaneous items where we talked about auto generation of a patient ID, AutoArchive patient data. A lot of these things you want to go to that help menu, which I showed earlier on. And you can research as to what these do. Sometimes the description is good. Sometimes it’s really poor. But if you want to do a certain thing, you can go to the help menu, and it is searchable. So if you have specific questions about what you’d like to see, you can type it in there.
Removable media, if you have a DVD recordable, this is where you would format that media. Button, we saw this. And then data flows, these are various data flows you can use when you set up, for example, a print button. You can have it do multiple things.
Measurement, this is where you can change all sorts of measurements and their parameters. This is more than most people would do here, so typically you’ll just skip it. And then for reports, here are some templates you can use for various reports. Most people are fine with the standard that comes with it, but just so you know that it is customizable there.
So that concludes the training on the GE Logiq e ultrasound machine. Thank you for watching.

