GE Logiq e Measurements and Calcs: Ultrasound Training Part 3
The GE Logiq e has an extensive calculations and measurements package, but it’s fairly straightforward to use once you understand how it works. This Logiq e training video will show you its key features and functions.
Making measurements and calculations with the GE Logiq e ultrasound machine
This installment of the GE Logiq e Training Series address making measurements and calculations on the GE Logiq e portable ultrasound machine. Much of what is taught here also applies to the GE Vivid e.
The Logiq e’s package can be cumbersome but fairly straightforward. It’s very customizable for those who prefer more automated measurements and calculation processes. This training video covers the basics and understanding how it works.
This is one among many of our videos in our Ultrasound Machine Training library. Looking to buy a GE ultrasound machine? Call one of our sales experts today at (877) 661-8224.
Complete GE Logiq e Training:
Part 1: Getting Started with the GE Logiq e
Part 2: 2D Imaging with the Logiq e
Part 3: Logiq e Measurements and Reports
Part 4: Doppler and M-Mode Imaging
Part 5: Exporting and Connectivity with the Logiq e
Part 6: Logiq e Setup and Customization
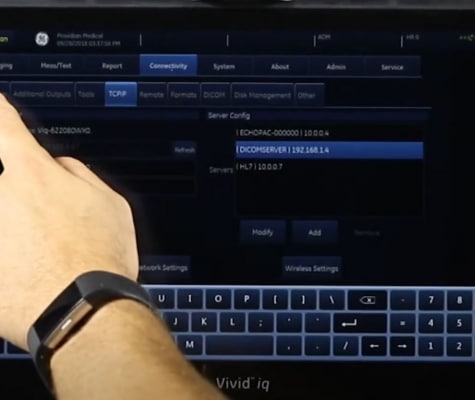
Configuring DICOM on the GE Logiq e and Vivid e
Improving frame rates on the GE Logiq e and GE Vivid e
Transcript to Logiq e Measurement and Calculations Training:
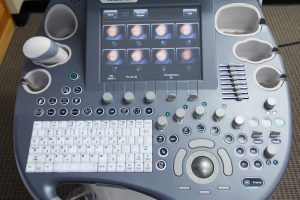
To make measurements on the GE Logiq e, press this freeze key. Next step will be to press the measure key. Measure does both standard distance and basic measurements as well as calculations. The following keys are used in measurements. There’s clear, measure, set, and ellipse. You can all use the trackball.
First, we’ll hit the measure and a caliper appears. Basic measurements, which is simply taking, hitting set and drawing a line, and hitting set again. Before I do that, note that I can hit the measure key and go back and forth and make adjustments to the previous cursor. Once I get the image that I like, I can press set, and it completes the measurement, and the results box is in the bottom left. Now, if you want to go back and change that measurement again, you can twist this cursor select and it will reactivate that caliper. And then I can hit measure to go back and forth between the measurements. You hit set and then it saves that measurement. Press clear to get the measurements off the screen.
For the ellipse, we’re going to hit the measure key, set and draw the line, and then we’re going to take this ellipse and build our ellipse this way. So we can stretch it, move it, press measure to continue to make our adjustments to go back and forth, and then set to save that measurement. I’ll press clear to delete that.
For trace, you’re going to press measure twice. First, you have your cursor. Now, you have a little circle. That means you’re going to be tracing, and you’ll get the dotted line to make your trace. If you want to go back, like the measurement you made, you can use this ellipse key to backspace and correct your measurement. Hit set and it completes that trace for you.
Now, the results box is positioned in the lower left hand corner. If I want to move that, I could take this cursor, click, and drag it around the screen and place it wherever I want. So you’ll notice this here, and this will also hide the menu to make it smaller. So you hit the cursor and the set key on the top part of the box and this area to move it. Go ahead and hit clear.
Now if I want to make a calculation, I’m going to measure again, and I’ll select the measurement I want to make from this menu over here. So I can select that measurement, and the results box will show live results based on the measurement that I made. Again, you can make the different adjustments and save your measurement there.
In Doppler mode there’s an auto trace feature. So if I go to pulse wave Doppler, we’ll need to use these paddles to activate that mode. So we’ll going to modify auto calques. And I’ll push to the right, and we can choose live or frozen or off. So live will show me, I’m going to go ahead and hit return. Live will show me the active measurements. And it will follow as you go along. I’m just tapping my hand on the probe to give an example of how the auto calques are working. You can also, if you don’t like the way that’s showing up, you can also do it in frozen mode again, by clicking here and choosing frozen.
Now, notice that this menu has changed completely since I went to the live auto calques. This says, OK, for my auto calques in this, I’m going to vascular carotid. And then it’s going to say, what calculations do you want to show up when you’re doing the auto calques? Right now its peak systolic and diastolic, but you can, if all of these show up on that auto calc, granted that will really fill up your screen, but it is an option for you to do that.
I’m going to turn this back off and click return. You can also activate the auto calculations by again, selecting this. You’ll see down at the bottom you can flip it on to frozen, live, and you can go through that way. If you want duplex imaging, then you turn duplex on and off, so you’ll get the live image up here, the live 2D and the live Spectral Doppler, and that’s here. If you want to triplex, that is in the system set up where you’ll click on for duplex, and it will show up there and allow you to do the triplex imaging.
So let’s go to a live image here and show you how to save the measurements. So you can see how the auto calc came along. First, I can choose my cycle select, and it will go to various cycles and change which one is selected. Next, I want to assign that measurement. So here I’ve assigned it to write proximal, so it’s says, proximal right CCA. And now, since I’ve clicked on that, there’s a check mark showing that I have made that calculation, and it will show up in the worksheet. So we’ll show the worksheet here by pressing on the cursor button by clicking on worksheet. And here it shows the measurements we’ve made. Notice it turns green. That means I can click in there and make an edit to that measurement. Backspace, and if I change that measurement and leave it, it’s going to show an asterisk showing that this measurement was edited by the user.
You also show all the generic measurements we made. Just showing length doesn’t really give you any information, so normally when you make a generic measurement with no calculation assigned, it’s something that you would print with a label on screen. So go ahead and exit. And these are the items that would go out on the report right here for the vessel summary. Did the proximal CCA, peak systolic, and diastolic. And again, if we want to change that, we go to the worksheet– oops– and make that change right there.

